The word Sarvangasana (the shoulder stand) is derived from the Sanskrit language and in Sanskrit, ‘sarva’ stands for ‘all’ and ‘ang’ stands for ‘parts of a body’ and ‘asana’ ‘means pose.’ According to the experts, people who practise Sarvangasana daily feel happier, vigour and confident like new energies are flowing in their bodies. Remember, a peaceful and disciplined mind is the key to being responsible for all your karma and changing your destiny.
If you are a beginner, it is important to wait until you can do this advanced stage yoga pose. Sarvangasana is an advanced stage yoga pose this engages the entire body below the neck and doing this pose without the proper instruction can lead to injuries.
Today, we will discuss the “benefits of Sarvangasana” and the steps to practise Sarvangasana. It is always advisable to follow every step carefully.
Benefits of Sarvangasana 2022 (the shoulder stand):
- Sarvangasana benefits When you raise your entire body in the upward direction against the area above your neck helps to reverse the blood flow.
- When you raise the entire body, this reduces the blood flow in the neck and head and when the blood rushes backwards, this is beneficial for people who suffer from low blood pressure problems.
- If you are suffering from some respiratory problems, practicing Sarvangasana benefits in increases blood flow in the lungs.
- Sarvangasana benefits for those people who suffer from anxiety, thyroid and parathyroid issues.
- The shoulder stand is great for people who suffer from irregular bowel issues and constipation problems. You just need to drink a glass of water before you practise this asana correctly.
Sarvangasana Steps:
- Before you practise Sarvangasana, it is better to practice a few other asanas before you do this asana to prep your muscles.
- You can do Tadasana or lower back exercises and neck exercises to prep your muscles for Sarvangasana.
- Your spine should not be stiff before you practise Sarvangasana.
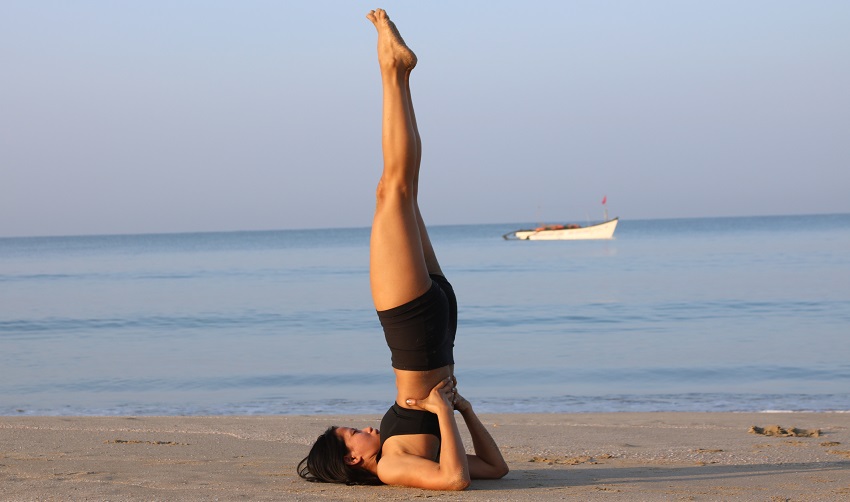
- The first step to practise Sarvangasana is to lie down in a corpse pose (Savasana) and make sure your hands are sideways and your feet are together.
- Then, slowly bring your legs close to your chest area and then, slowly lift the lower body as you do in a plough pose or halasana.
- Then, you need to place your hands below your back and then slowly lift your legs. When you are doing this, make sure that your entire body is straight and your upper arms are giving support to your back to lift your body.
- You need to hold the Sarvangasana for at least 10 seconds and then breathe normally.
- Then you with the help of your hands, move your upper body down, avoid jerk and while you are practising this asana.
- At last Sarvangasana Steps, you can come back to the starting position and rest.
Things to Keep in Mind while practising Sarvangasana are:
Always practise Sarvangasana under supervision, especially if you are a beginner and have never done this before.
If you are having a neck injury, do not practise this asana.
If you had a shoulder injury, then also you should avoid practising Sarvangasana and wait until you are fully recovered.
Make sure you pay full attention to your neck while practising Sarvangasana because a minute mistake can lead to a severe neck injury.
Make sure you take complete support of your arms so that your neck does not take excess pressure or pain.
Old people with high blood pressure, slipped disc, back injury, heart problem, or neck problem should avoid Sarvangasana.
Do not lift your upper body or come down with a jerk. Being in a rush and not following all the steps can lead to injuries, so avoid that.
Once you finish practising Sarvangasana, you can practise Matsyasana (the fish pose) and Bhujangasana (the cobra pose).